Images
Images and alternate text
Alternate text makes content understandable when images cannot be seen
The function of alternate text is to make content containing images understandable when images cannot be seen. This can be because readers have limited vision, because search engines can only read text, or because users turn off image rendering in their browser. To avoid impeding the flow of a document or the ideas expressed in it, alternate text must work well with surrounding content when it stands in place of images.
When not to use alternate text
- Before images can be used in the editor, authors are prompted to identify images as decorative or non-decorative.
- Decorative images (spacers, bullets, borders, etc.) must not be given alternate text, or they risk distorting content.
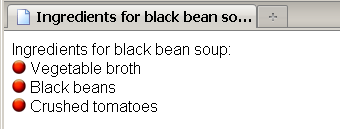
- The editor automatically disables alternate text for any image identified as decorative. Were this not so, listen to the comic effect produced by a screen reader or other non-visual device when reading the following recipe, where the bullet points are incorrectly given the alternate text "Red ball":
When alternate text is essential
- Non-decorative images (such as drawings, photographs, charts, etc.) form the majority of online images, and alternate text must be supplied for these images before they can be used in the editor. However, some content authors have difficulty composing alternate text.
- XStandard's "Images As Text" feature resolves this problem because it makes it clear what alternate text will work in a given context, by letting authors create and edit alternate text directly in the document, just like ordinary text.
Images As Text makes writing alternate text simple
- One example of a foolproof method of authoring alternate text using the Images As Text feature is seen in the screen shot below. The author highlights text in the document, then selects "Replace text with image" from the context menu, or by pressing the Image button on the toolbar.
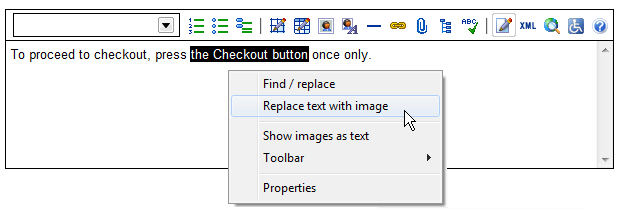
- The result is seen in the following screen shot where the image selected replaces the highlighted text, and the highlighted text ('the Checkout button') becomes the alternate text for the image:

Images As Text also makes editing alternate text simple
- Authors can review the alternate text behind an image by selecting "Show images as text" from the context menu, or by pressing the Image button on the toolbar.
- Alternate text appears between image markers and can be edited directly in the document, just like surrounding content.

Spell checking alternate text
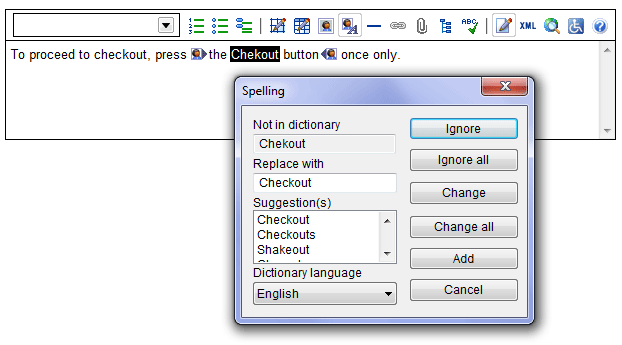
- When authors perform editing operations on a document, such as find/replace or spell checking, the editor automatically switches to Images As Text mode. This includes alternate text in these operations. As seen in the screen shot below, authors correct spelling mistakes in alternate text by typing directly in the document, between the image markers.
Editing images
Edit images through the Image properties dialog box (seen below). To display the Image properties dialog box, double-click on the image, or select the image and, in the context menu, choose Image, then Properties.
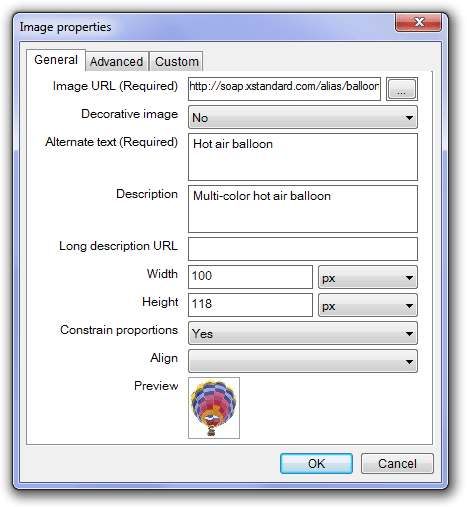
Image URL (Required)
- The Image URL (Required) field automatically displays the file name of the uploaded image.
- To browse for alternative images, select the box to the right of the Image URL field.
Decorative Image
- In this field, indicate if the image is decorative or not by selecting Yes or No.
- If the response is "Yes", the following alternate text field will be disabled, since alternate text should not be entered for decorative images. Read When not to use alternate text .
- If the response is "No", (i.e. if the image is not a decorative image), authors must enter Alternate Text for the image in the following field before the image can be used.
Alternate Text
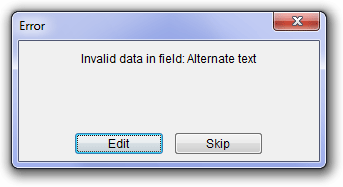
- The warning below displays when no alternate text is entered for non-decorative images. Authors can choose to enter the missing alternate text immediately (Edit), or later (Skip).
Description (optional)
- Under Description, enter a tooltip for the image (text that displays when the mouse pointer hovers over an image).
Long description URL (optional)
- Enter a URL to a Web page containing a description of the image.
Width and height
- The Width and Height fields display the dimensions of the image selected.
- Resize images by modifying the width and height, in pixels, or as a percentage of the width of the page.
Constrain proportions
- Under Constrain Proportions, select Yes to avoid distorting images during resizing.
Align
- Under Align, choose Left or Right to align an image to the right or left of a portion of text.
- Left align floats the image to the left, wrapping text to the right of the image.
- Right align floats the image to the right, wrapping text to the left of the image.
Preview
- The Preview feature offers a thumbnail of the image being up-/downloaded. This feature helps in composing appropriate alternate text when a single piece of content uploaded to the editor contains several images.
Insert an image
Images can be uploaded into the editor in 6 ways:
- Drag an image into the editor
- Browse and select images from libraries
- Enter a direct URL for an image
- Copy then paste an image from the file system
- Copy then paste an image from another application, such as Photoshop
- Use PRINT SCREEN to capture an image from your monitor.
Drag an image into the editor
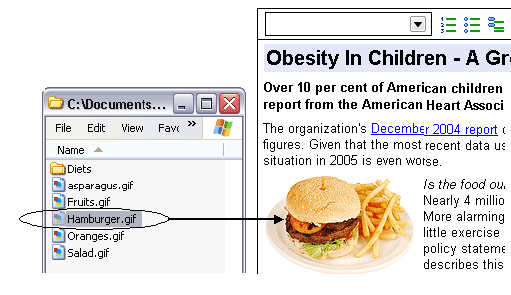
- In Edit mode, select an image from the desktop.
- Drag the image into the editor, to the position where you want the image to appear.
Browse and select images from a library
- In Edit mode, place the cursor at the point you want the image to appear.
- On the toolbar, select
 , or, in the context menu, select Toolbar, Buttons, then Image.
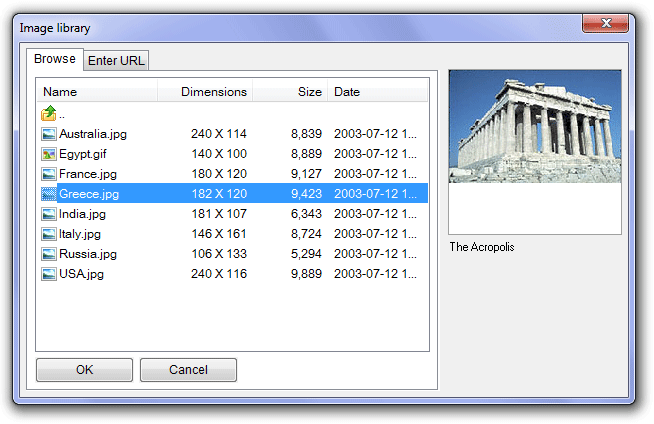
 - In the Image library dialog box that displays, under the Browse tab, select an image. System Administrators determine which image sources are available.
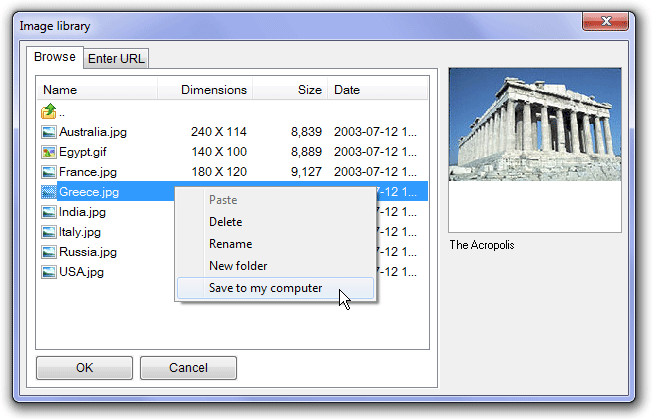
- As seen in the screenshot below, when an image is selected, the dimensions of the image, its file size, and the date on which the file was last modified are displayed in the left panel.
- A thumbnail of the selected image appears to the right.
- Text appearing beneath the thumbnail is the image's alternate text, if available.
Enter a direct URL for an image
- In Edit mode, place the cursor where you want the image to appear.
- Select
 on the toolbar or, in the context menu, select Toolbar, Buttons, then Image.
 - In the Image Library dialog box that displays, under the Enter URL tab, enter the URL of the image.
- Select Preview to display a thumbnail of the image, the size of the image file, and the image's dimensions. If no thumbnail displays, the URL is incorrect.
Copy then paste an image from the file system
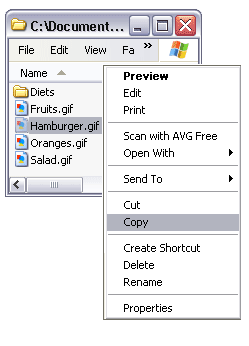
- Open the file system, select a file and, in the context menu, select Copy.
- Place the cursor in the editor at the point you want the image to appear and, in the context menu, select Paste.
Copy then paste an image from another application, such as Photoshop
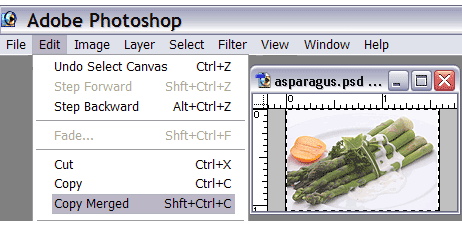
- In the application, select Copy or Copy Merged to copy the image.
- Place the cursor in the editor at the point you want the image to appear and, in the context menu, select Paste.
Use PRINT SCREEN to capture an image from your monitor.
- On the keyboard, press PRINT SCREEN to capture a screenshot of the image displayed on the monitor screen.
- Place the cursor in the editor at the point you want the image to appear and, in the context menu, select Paste.
Optional Features
Save To
- When an image is uploaded, if the Save To feature is enabled, the Upload image dialog box opens (see below).
- Use the Upload image dialog box to save images to an existing folder, to a new folder, or to a renamed folder, or sub-folder. System Administrators determine to which folders and/or sub-folders authors may save images.
- The Library and Folder fields located in the upper section of the Upload image dialog box confirm the location of saved images.
Rename / Replace Uploaded Images
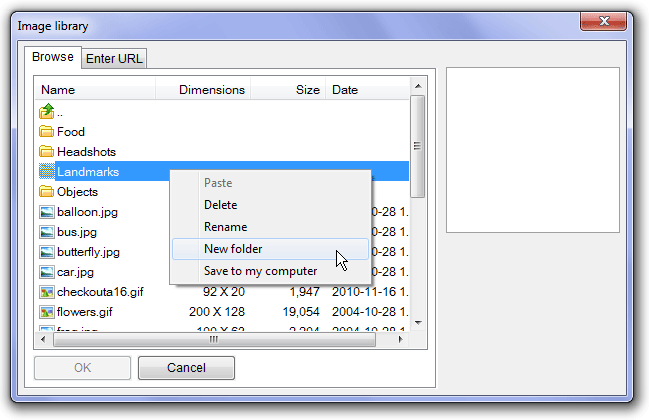
- When the filename of the image that you are uploading already exists, the Filename already exists dialog box displays.
- This dialog box allows you to rename the file you are uploading, or to replace an existing file with the uploaded file.
- In the screenshot below, both options are enabled. Enter a new filename (using the same type of file name extension) if you wish to rename the uploaded file. Alternatively, choose to replace the existing file with the new one.
Save Images To My Computer
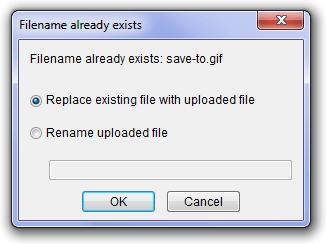
When available, this feature permits users to save to their computer an image found in the image library.
- In the Image Library dialog box, under the Browse tab, with the cursor in the chosen image, open the context menu and select Save to my computer.
OR:
- In Edit Mode, place the cursor in an object, or the anchor text for an attachment, open the context menu and select Save to my computer.
Wrap Text Around An Image
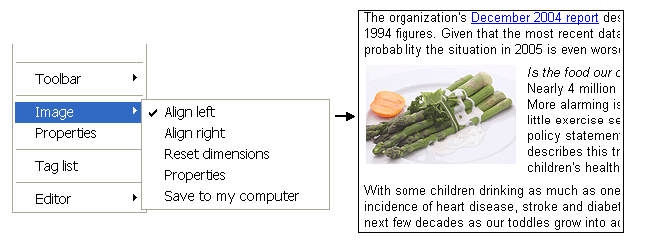
- Select the image and, in the context menu, select Image and Align right to float an image to the right, wrapping text to the left of the image.
- Select Align left to float the image to the left, wrapping text to the right (seen below).
- To remove text wrap from an image, de-select Align right or Align left.
Delete An Image
- Select an image and, in the context menu, select Delete.
- Alternatively, select an image and press the Delete key.
Resize An Image
There are two ways to resize images in the editor.
- Stretch an image to its desired size.
- Resize an image using the Image properties dialog box.
Stretch an image to its desired size
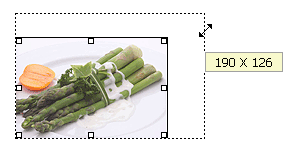
- Select the image so that "handles" appear.
- Place the cursor on any handle until double-headed arrows display.
- Drag the double-headed arrows until the image reaches the desired size. To avoid distorting images during resizing, drag only the corner handles, as seen below.
- The new dimensions of the image display (in pixels) as the image is being resized.
Resize an image using the Image properties dialog box
- Select an image and, in the context menu, select Image properties.
- In the Image properties dialog box, modify the height and width of the image, in pixels or as a percentage of the page.
- Selecting Yes under Constrain Proportions avoids distorting images when resizing.
Restore the original dimensions of an image
- The original dimensions are the dimensions of the image at the time it was first uploaded into the editor.
- To reset an image to its original dimensions, select the image and, in the context menu, select Image, then Reset dimensions.