Installation
Download the installation program and double-click on it to begin installing ScriptQ.
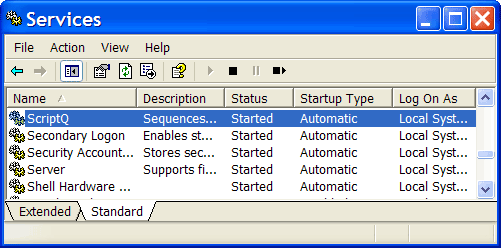
ScriptQ is a Windows service as shown in the "Services" window screen shot below. The security context in which ScriptQ runs can be changed via this "Services" window.

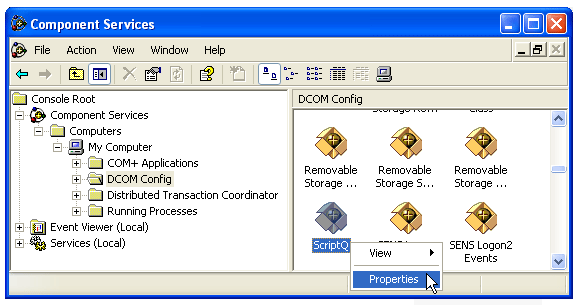
In order to access ScriptQ from environments like Active Server Pages, set file permissions via "Component Services". From "Control Panel", select "Administrative Tools > Component Services". In the left panel, select "Component Services > Computers > My Computer > DCOM Config". In the right panel, right click over ScriptQ and select "Properties" as shown in the screen shot below.

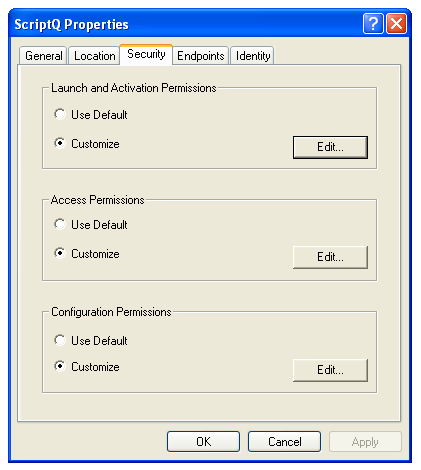
In the "ScriptQ Properties" dialog box show in the screen shot below:
- In "Launch and Activation Permissions", click the "Edit..." button and grant Everyone group or the IUSR_<machine> account permission to "Local Launch" and "Local Activation".

When you run the ScriptQ Monitor application, which is a GUI for interacting and monitoring the ScriptQ service, run ScriptQ Monitor as Administrator. To do this, right click over the shortcut to ScriptQ Monitor to bring up the context menu. Then select "Run as administrator".